

I've been wishing to cook these chiles for months! Remember when I cooked the Chiles en Nogada? Well, a week later my husband told me "one of these days you should make some chiles rellenos de queso {cheese filled chiles}" and I said "yes! sounds good, I'll make them soon". And weeks went by, months too... but now, here they are...
There are many different ways to prepare these chiles filled with cheese (queso). The important thing here is to use a cheese that won't melt. I mean, you could also use Mozarella or Monterey Jack, but the recipe won't be as it originally is supposed to be prepared.
I used a fresh cheese, called Panela. You can use Panela, Ranchero, Panela Canastita, even Cottage.
Many people fill the chile with cheese and only cheese. Others use cheese in a tomato sauce. Some of them, also add corn. With or without tomato sauce. Some of them spread at the end some tomato sauce, like if it was gravy. So, you can prepare it many ways. This is how I prepared them last night. I decided to make grilled corn instead of adding corn inside the chile.
I hope you try this recipe. It tastes so good!
Mental note to self: I'm thinking of giving a twist to this recipe and prepare these chiles with beans and melting cheese, maybe Ranchero?
Another thing I would like to say before getting to the recipe: When there are low prices -and by low prices I mean one dollar for 2 pounds- in vegetables as tomato for example, I buy 5 or 6 kg (12 lbs), make a lot of puree (in the food processor), place it in 1-cup and 2-cups portions and then freeze them all in ziploc bags, tagging them. And every time I know I will be needing tomato puree/sauce, I just move one of the ziploc bags to the fridge a day before.
Now, let's get to the yum-yum-yum part =0)
In order to prepare 3 chiles you will need:
- 300 gr of fresh not melting cheese (I used regular Panela)
- 1 tbsp Knorr's chicken broth bouillon
- 1 tsp pepper
- 2 cups tomato puree -you will see that there is more in the picture, I thought I would use more, I didn't
- 3 chiles poblanos (to fill)

First, cut the cheese in big squares as shown in the picture below.

Place the cheese in a medium-heat skillet. I didn't use any oil because (1) this cheese is not melting and (2) because my skillet has teflon, and I know it won't stick. If you are using an iron skillet or something else, place 1/2 tbsp vegetable oil before the cheese, or spray it with PAM -non stick spray-.

Turn the pieces around, so that they brown evenly.

This is looking so good, right?

Now, add the tomato puree and stir, so it will cover all the cheese.

Wait until it starts heating or boiling, and add the chicken broth bouillon and the pepper. Stir and cover for 10 or 15 minutes. Stir occasionally. While you are waiting for the cheese to be ready, I highly recommend you to start working on the chiles.

You will notice that the cheese is so soft, not melting, but really soft. Lower the heat, uncover and let it there for another 5 minutes, then remove from heat. This will help you get rid of the much water the tomatoes have.

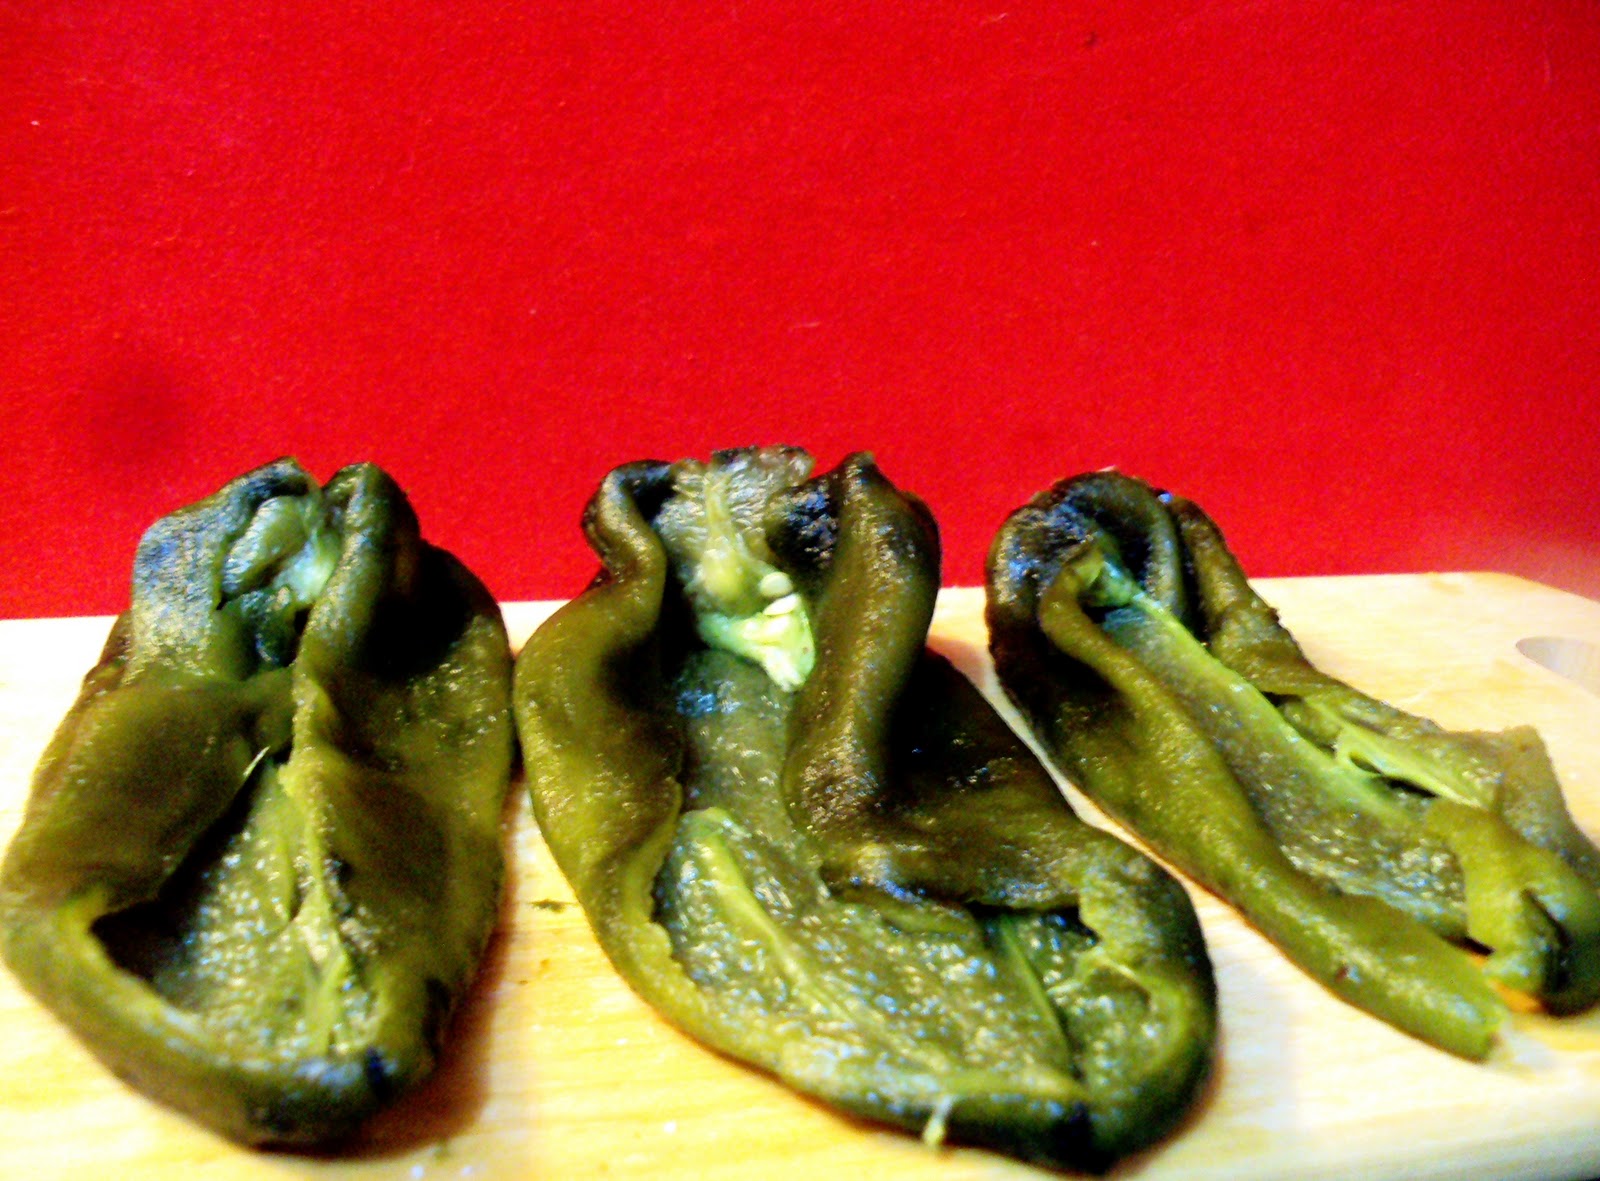
Now the chiles... as I said in my Chiles en Nogada post, you can either use chiles that are ready to fill -roasted and freezed- or you can roast them. No matter which way you choose, you will need to take off all the seeds and veins. The roasting may take you around 45 minutes to 1 hour.
Roasting Chiles:
You will need a cast iron skillet on high heat. Place the prewashed chiles and leave them for 8 minutes (until their skin is black and kind-of-crunchy). Turn them over and repeat until all the chile skin is black. Now place them in a plastic bag and close it. This will let them sweat and will make the process of taking off the burnt skin easier.
When working with chiles you will notice that your hands may feel itchy, so you can either (1) before starting, use some vegetable oil in your hands as if it was hand lotion and then work with the chiles or (2) work with the chiles and then place you hands under running water for 5 minutes.
Here are the chiles I used, washed, with no veins or seeds.
Now, fill the chiles with the cheese you just prepared. If you are eating them right now, try to srve the most cheese and tomato you can, and leave the water-ish sauce in the skillet. If you are taking them and heating them later, for a reunion or lunch, then add some of this water-ish sauce. This will help you keep the humidity for the chile. I served them with Grilled Corn.

I hope you enjoy this recipe!


No comments:
Post a Comment