12.13.2011

Pastel Azteca


I had a breakfast to host last Saturday, a family reunion. The second Saturday of every month, the women from the family get together to talk and update on any matter, and this time it was my turn to host the breakfast. So I decided to make a "Pastel Azteca" casserole and serve it with Black Beans.

This is a very traditional Mexicso an dish. It involves different traditional Mexican food. I made this one with corn tortillas, but you can also use tamales (meat, beans, cheese, any!), I also used Rajas con Queso {Poblano Chile with Cheese}, but you can add corn, sour cream, nopales, and many other veggies. Also, I used a spicy sauce that I bought, but you can also prepare your own sauce, for example the Green Sauce recipe I shared with you.

I will share with you the recipe I used for my Pastel Azteca. It has many different ingredients, so you can either buy everything and try it out or you can use your leftovers. I prepared the Pastel Azteca for the reunion, but I also prepared one smaller for my husband and me.

You will need:
  • 4 chicken breasts, cooked and shredded (I use chicken breast because I love it, but you can also use tights and legs. they're juicier, and it will be less meat, so maybe you will need like 6 thights and 4-6 legs)
  • 1/2 gal water (to cook the chicken)
  • Rajas con Queso (please see the recipe: 300 gr poblano chile slices, salt and pepper to taste, 300 gr Panela or fresh cheese, you could use mozzarella, 1 small onion, 1/2 tbsp vegetable oil)
  • 1 bottle (300 gr) of spicy tomato sauce (I used Del Primo Molcajeteada Roja)
  • 3 cups chicken broth (you can use the one that lefts when cooking the chicken breasts)
  • 3 cups of pureed tomatoes
  • 5 cups shredded cheese (I used mozzarella, you can use Mexican blend, Chihuahua, Ranchero, Asadero, Manchego)
  • 1 cup sour cream
  • 1/2 Kg corn tortillas (around 20 or 25 tortillas)

For the chicken:


Place the chicken and the water in a deep pot and heat until it starts to boil. 


Lower heat, cover and let it there for 25 minutes to 45 minutes, until the chicken is completely cooked. Reserve the chicken broth and take the chicken breasts to a bowl and let them cool, so it will be easier to shred.


Shred the chicken and reserve.


For the sauce: (remember, you can use the Green Sauce recipe I posted)


As my tomato puree was frozen, I placed it in a deep pot until it melted. 


I left it there to cook for 5 minutes, stirring occasionally.


Add the chicken broth and the sauce bottle, cook for 5 minutes covered on low heat and let it rest when done, with no heat.


For the Pastel Azteca:

So here I have the Rajas con Queso, the shredded chicken breasts, the spicy sauce, the sour cream, the corn tortillas, and the shredded cheese. I used a 9" X 13" baking casserole and a 9" X 5" loaf pan. We will go placing layer by layer as follows.


First, start with a layer of sauce, in the bottom of the pan.


Now, continue with a layer of tortillas. Try to leave no space between tortillas, so place one above the other.


Now, another layer of sauce.


Now, a layer of Rajas con Queso. You can follow the link and see how they are done.


Now, a layer of cheese and a layer of sour cream. You don't need to cover all in cream, because with the heat it will spread in all the surface. If you place a lot of cream, it will be full of calories and also very greasy and liquid-ish.


Now another layer of sauce and another one of tortillas. I forgot to take the picture of the sauce-before-the-tortillas, but make sure you always have sauce below and above the tortillas, so they will be wet and not dry.


Top with sauce.


Now add chicken. A lot.


Now, sauce and tortilla and sauce.


Plenty of cheese. This is the last layer. If your pan is deeper, you can add another layer of chicken if you want.


Now, place it in the oven for 20 minutes at 375°F (190°C). Let it sit for 15 minutes before serving. It will be more "servable" and less "liquid-ish".


This is how it looks if you don't let it sit. =S


You want some?


Enjoy!


December 14:

  I'm linking to Stacy's Show Me What Ya Got #53 party
 I'm linking to Michelle's Fabulous Friday party at Faith, Trust & Pixie Dust 

12.09.2011

Rajas con Queso {Poblano Chile with Cheese}


I'm having a breakfast on Saturday, so I'll be cooking a Pastel Azteca or Pastel de Tortilla. This layered cake has many layers, and one of them is Rajas con Queso. This is a very traditional Mexican dish, a little spicy. It's made with poblano chile, onion and cheese. You can add corn too, tomato sauce, many things!

So, I'm going to show you how I made these Rajas con Queso. I tried to make them very simple and plain, because they will be part of a layered cake that will have chicken, cheese, sour cream, tortillas, and so much more!

I used: 
  • 1/2 bag of rajas poblanas (poblano chile slices), around 300 gr
  • salt and pepper to taste
  • 300 gr Panela cheese
  • 1 small onion
  • 1/2 tbsp vegetable oil

Coarsely chop the onion.


Cut the cheese in bite size squares.


Heat the oil in a skillet and add the onion. Low heat.


Stir continously until onion starts losing color.

   
Add the poblano slices, you can add them still freezed. Here is where you add frozen corn too.


Add salt and pepper to personal taste. Here, I usually add a tbsp of Knorr's Chicken broth bouillon, but as these Rajas con Queso will be part of a layered cake that will have a lot of chicken and chicken broth, I won't use this chicken broth mix this time. If you want to use canned corn, here is where you add it. You can also add here the tomato puree if you'd like (around 1 cup).


Stir until the poblano chile is unfrozen and then add the cheese.


Stir and cover for 5 minutes at the lowest heat. Uncover and stir again, trying not to break the cheese or the chile. They are ready!


You can make Rajas con Queso tacos!


Natural Christmas Potpourri


Christmas season. I just love it; always have, always will. And now, I have my own house and I want it to smell so good. I bought a Febreeze Air Effcts Air Freshner Apple Spice & Delight, that it actually smells so good, but the smell won't last. 

Febreze Air Effects Air Freshener Apple Spice & Delight, 9.7 oz

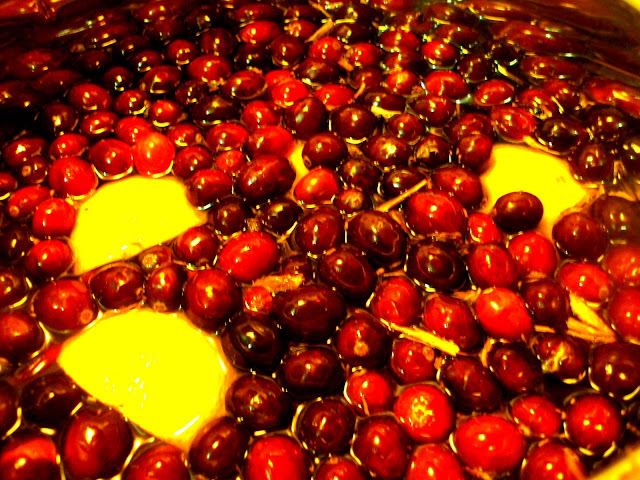
So, I started looking on Pinterest for a DIY Christmas potpuorri and found one recipe that sounded so good to me on Make it Do blog, called "The Smells of the Season". So I wrote down the recipe, and went to look for the ingredients. I already had all of them in my kitchen, except for the fresh cranberries. Here, in the North of Mexico, it's difficult to find fresh cranberries. You can find almost everywere dry dranberries, but fresh are more difficult to find. I started looking for them in different stores, asking people, and finally, asking on Facebook. Walmart Mexico replied and told me they had, so I went to buy them and here it is. the final product. I hope you enjoy it and try it too. It's real good.

So, you need:
  • 200 gr (6 oz) fresh cranberries
  • 3 cinnamon sticks
  • 1 orange
  • 10 whole cloves
  • water


Cut the orange in quarts.


Cut or crush the cinnamon.


The cranberries.


The original recipe calls for a tablespoon of cloves. Please don't ask me why I used only 10 cloves! Please don't, because I DON'T KNOW WHY. I will add more tonight.


Place everything in a pot and cover with water. Leave on the stove top, on the lowest heat, and stir occasionally. Your home will start smelling so delicious. My mom came to visit and she was like "Oh, it's smells delicious" and then I took her to the kitchen and show her the potpourri and she was like "Why don't you make a marmalade instead?" LOL. Anyways, the smell is delicious. And maybe I will make a marmalade. I will just add sugar and a lot of stirring, right? Let me think about it, because I've been thinking on doing one Mango, Ginger and Mint marmalade.


According to the other blog instructions, you should never leave the pot withouth water, so if you see that it's drying, add more water. I will turn it up every day from here to mid-January (the blog says it lasts several weeks). I love the smell! My husband loved it too, and he also thought I was cooking marmalade. LOL. Beautiful smell. So peaceful, full of joy and a constant remember of Christmas season. I just love it.


December 14:

 I'm linking to Michelle's Fabulous Friday party at Faith, Trust & Pixie Dust 
 I'm linking to a daydreaming blogger pinterest pintest linky party  

Pinterest Logo   Look for it in Pinterest!

December 16:

Grab My Button I'm so honored to be featured in Michelle's Faith, Trust and Pixie Dust Fabulous Friday Favorties 14!! Thanks do much!